
Services
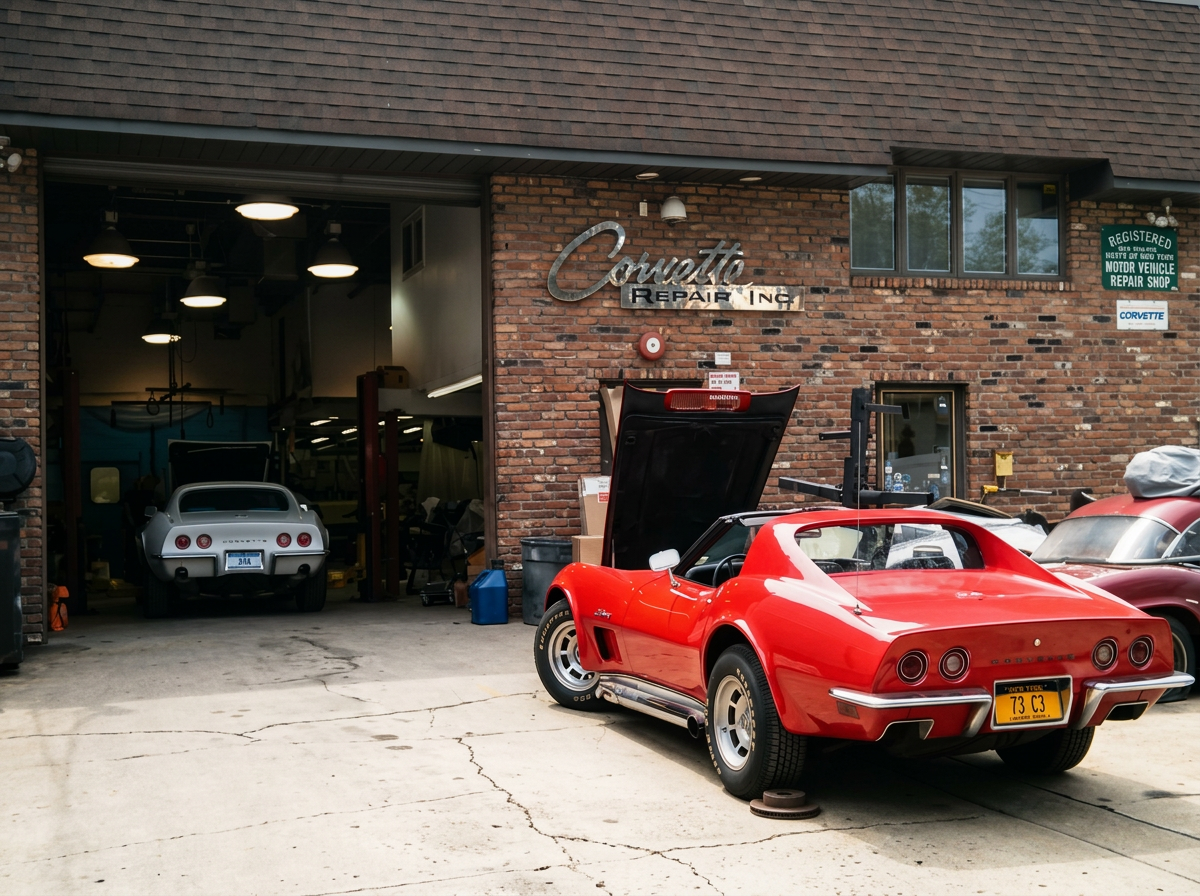
Whether you need a complete body‑off restoration or a minor repair, you can trust our extensive knowledge and 40+ Years of experience to deliver the results you expect.
RESTORATION
We’ve created a whole new level of state-of-the-art restoration, which is why we’re the #1 Corvette shop in America.
REPAIR
Whether you own a classic or new Corvette, our certified mechanics will ensure you get the best possible repairs at the lowest cost.
APPRAISALS
Consider us your personal shopper and agent. We are experts in finding the perfect car for you and verifying its authenticity.
WANTED
Experienced Corvette Fiberglass Repair / Painter
Corvette Repair, Inc., is looking for an experienced fiberglass repair and painter to join our team.
If you’re dedicated to producing the finest Corvette restorations in the world, are a self-starter with a great attitude, and take real pride in your work, we’d love to hear from you.
We’re seeking someone who is highly skilled in all aspects of fiberglass repair and the application of both urethane and lacquer paints. You’ll be joining a world-renowned restoration team that sets the standard for quality.
Tech Tips: Mid-Year Body Removal & Reinstallation
This guide walks through the complete process of removing and later reinstalling the body on a mid-year Corvette (primarily 1963–1967). Follow the steps in order, label every part and fastener, and work carefully to avoid damage to the fiberglass body or original components.
Quick Reference Checklist – Body Removal Sequence
Work through these 26 items in order. Most are “disconnect only” or “remove.” Detailed instructions for the more involved steps follow afterward.
Battery – Disconnect only
Steering column – Disconnect and remove
Master cylinder – Disconnect lines only
Clutch rod pedal – Disconnect wire clip only
Back-up light plug – Disconnect only
Accelerator rod and ground straps – Disconnect only
Oil pressure line (big- and small-block) – Disconnect only
Engine wires:
Temperature sending unit – Disconnect only
Coil wires (+ and –) – Disconnect only
Brake warning wire (1967 only) – Disconnect only
Alternator wires – Disconnect only
Distributor tachometer drive unit – Disconnect only
A-frame dust covers – Remove from under A-arm
Hood – Remove from car
Shifter ball and T-handle – Remove
Side-pipe covers or rocker moldings – Remove
Front bumpers and braces – Remove
Starter wires – Disconnect and remove
Splash shields (large and small) – Remove
License-plate trim – Remove
Rear exhaust panel – Remove
Gas-tank sending-unit wires – Disconnect and remove
Antenna and ground strap – Disconnect and remove
Seat-belt anchors (left, right, and center) – Disconnect and remove
Emergency-brake cable – Disconnect
Body-mount rear access-door covers – Remove
Ground strap at left-front body mount – Remove
Radiator core-support bolts (lower only) – Remove
All body mounts – Remove
1963–1964 coupe – 10 bolts
1963–1964 roadster – 12 bolts
1965–1967 coupe – 8 bolts
1965–1967 roadster – 10 bolts
Detailed Removal Instructions
Battery
Disconnect the battery cables at the battery itself. This is the first and most important safety step.
Steering Column at Gear Sector
Before removing the flexible (or pot-joint) coupling, lower the mast jacket and pull it rearward far enough to free the coupling. Never let the steering column hang from the dash panel—this will distort it. Support the column once the instrument-panel mounting bracket is removed. Remove the special bolt from the coupling clamp (requires a 12-point socket or box wrench). Tap the coupling lightly with a soft hammer to slide it off the wormshaft. The coupling is spliced to the wormshaft.
Master Cylinder – Lines Only
Wipe the master cylinder and lines clean. Place dry cloths underneath to catch any fluid. Disconnect the hydraulic lines at the cylinder. Immediately cover the open line ends with clean, lint-free cloth to keep dirt out of the system.
Clutch Rod Wire Clip
The clip is located directly below the master cylinder where the clutch-pedal rod meets the clutch cross-shaft. Insert a screwdriver and pry the clip free.
Back-up Light Plug
Located behind the distributor. Pull the connector apart carefully so the wires do not pull out of their sockets.
Accelerator Rod and Ground Strap
Disconnect the accelerator rod at the carburetor throttle lever by removing the throttle spring or cotter pin. Remove the ground strap by taking out the hex-head bolt on the main accelerator base lever near the firewall.
Oil Pressure Line – Small-Block and Big-Block
Small-block: The line sits to the right rear of the distributor (looking toward the front of the car). Use a 7/16-inch open-end wrench. Avoid bending the copper line. Big-block: The line is on the driver’s side near the oil filter. Removal is the same as the small-block.
Top Engine Wires (including Temperature Sending Unit)
These wires are on or near the top half of the engine:
Coil wires at the coil (+ and –) – remove the 1/4-inch nuts.
Water-temperature sending unit – unplug the connector.
Alternator wires – remove the 7/16-inch nut and unplug the connector.
Brake Warning Wire (1967 Only)
Located under the proportioning valve below the master cylinder. Pull the plug downward to disconnect.
A-Frame Dust Covers
Pull the covers up and out of the upper A-arms.
Air Cleaner on Fuel-Injection Cars
Remove the large 4-inch clamp that holds the air cleaner to the injection unit. Remove the four metal screws that attach the “S” tube (or metal duct) to the radiator support. Remove the screws that hold the air-cleaner body to the inner fender well (accessible from the left wheel-well opening).
Hood, Radiator, and Shroud
Hood: Unbolt the hood at the latches (bolts are on the hood itself). After removal the complete latch assembly should remain attached to the inner fender-well skirt. Radiator: Disconnect inlet and outlet hoses. Disconnect transmission cooler lines if equipped. Remove the shroud-to-radiator-support screws and rest the shroud on the engine fan. Remove the upper support-bracket screws and carefully lift the radiator out. Air-conditioned cars: Remove the bolts holding the receiver-dehydrator bottle and let it rest in place. Back out the left-front hinge-to-body bolt. Remove the two upper radiator-support bolts on each side and loosen the lower bolts. Tilt the radiator support rearward and carefully remove the radiator.
Shifter Ball and T-Handle
Unscrew the shifter ball counterclockwise from the shifter rod. Lift the T-handle off. Do not lose the spring or the nylon washers.
Side-Pipe Covers or Rocker Moldings
Side-pipe covers: Remove the two Phillips-head screws and speed nuts at the front and rear of the rocker moldings. Lift the molding off its retainer. The side-pipe shield is held by Phillips screws (including those inside each front fender well and just ahead of the rear fender well). Remove those screws to free the shield. The side-pipe muffler itself does not need to be removed. Rocker moldings: Remove the two Phillips-head screws and speed nuts at front and rear, plus the attaching screws on the bottom of the molding. Lift the molding out at the bottom and up off the retainer.
Front Bumpers and Braces
The bumpers and braces can be removed as a complete assembly:
Remove the bolts and washers that connect the two lower braces to the frame.
Remove the bolts and washers that connect the small braces located in each fender well (one per side).
Remove the bolts and washers that connect the main support braces to the frame rails (one per side).
Pull the entire bumper assembly forward until the remaining braces clear the body.
Starter Wires
Three wires connect to the solenoid on the starter. They are held by a 9/16-inch nut and a 5/16-inch nut. Remove those nuts so the wires hang free. One additional ground wire is attached at the base of the starter; removing the outboard starter-support bolt frees it.
Splash Shields – Large and Small
Large splash shields: Located under the driver’s and passenger foot wells. Five screws hold each shield. Remove the screws and the shields come free. Small splash shields: Located directly below each fender vent. Four bolts hold each one—two outside the front fender well and two under the fender-vent body panel. Remove the bolts to free the shields.
License-Plate Trim
First remove the license plate (two screws). Then remove the four remaining screws that hold the trim plate (two at the top and one on each side of the lower half).
Emergency-Brake Cable
1963–1966: Disconnects at the pivot assembly under the car at the transmission cross-member (driver’s side). Remove the adjusting nuts to free the cable. 1967: Disconnects at the “Y” intersection under the car at the rear cross-member. Also remove the spring that connects the cable end to the frame and the white pulley just rear of the transmission cross-member.
Body Drop – Cautions and Procedure
Before dropping the body, take a few extra minutes for safety and organization. Instruct every helper exactly what they are to do and not do. Do not lift at the nose area. Remove all jewelry, metal objects from pockets, and belt buckles. Provide inexpensive gloves for everyone. Point out each body-to-frame mounting area and its purpose.
Just before the drop, apply masking tape to the body above each mounting area so helpers have a clear visual reference. Double-check that every shim and body cushion is in its correct location, then tape over each mounting area (the same way the factory did) so nothing shifts.
Assign one helper to stand at the rear and watch that the rear quarter panels do not hang up on the frame—contact will damage fiberglass and paint. Assign another helper to stand at the nose looking into the engine compartment; the inner fender wells come very close to the front frame rails and may need a gentle outward push to clear.
Lower the body slowly. Reattachment and bolting are simply the reverse of the removal sequence. Do not hurry, and double-check everything.
What To Do First After the Body Is Off
Photograph every part of the chassis and all components before anything is disturbed.
Clean the chassis and parts with mild soap and water so you can inspect each piece for condition, original finish, and any remaining codes.
Note the exact location and number of shims at every body mount.
Tools and Items Needed
Jack stands
Engine hoist
Engine stand
Assortment of wrenches and ratchet set
Spring compressor
Wire brush
Bench grinder with wire wheel
Floor jack
Scotch pads
Spray gun
Dip bucket
Chassis Disassembly
Once the body is off, follow this order:
Remove the engine, transmission, and driveshaft.
Remove all exhaust components.
Remove the gas tank.
Remove the steering box and complete tie-rod assembly.
Remove all brake hoses, brake lines, and fuel lines.
Remove the four shocks.
Remove the front spindles.
Remove the upper and lower control arms (the coil springs will drop out).
Remove the front sway bar.
Remove the rear leaf spring.
Remove the rear struts on both sides of the differential carrier.
Remove the rear spindles on both sides.
Remove the complete rear-end housing.
The stripped chassis is now ready to be cleaned for restoration.
Replace vs. Restore
Keep the engine, transmission, and rear differential original whenever possible. If they are in poor working condition, rebuild them to factory specifications rather than replace them—replacement reduces authenticity and value. If the car has a solid driving history with no drivetrain problems, simply clean the components internally and externally. Any part that carries a date code (alternator, exhaust manifolds, radiator, etc.) should be rebuilt only if necessary and then cleaned to look assembly-line fresh. Parts without date codes that are worn beyond rebuilding should be replaced only with exact original-style replacements.
Cleaners for Freshening Original Parts
These cleaners will restore almost any part to near-original condition without replating:
Mild dish detergent and water
Paint strippers
Lacquer thinner
Naval jelly (for rust removal)
Scotch pads
SOS or Brillo soap pads
Use caution so you do not damage or destroy any original finish that is still present.
Codes to Look For
Two cars built on the same day can have different codes. The following are the most common ones found on mid-year Corvettes:
White stenciled part number and production date on the right frame rail (applied by A.O. Smith in Michigan).
Yellow dabs of paint on the tie-rod ends and steering link.
Stenciled yellow part number on the driveshaft.
Crayon slash marks on the frame rails indicating the number of shims (color may vary).
Paint mark on the driveshaft and rear-end flange that must be aligned during reassembly (usually yellow, but color can vary).
Chassis Reassembly
There is no single “correct” sequence, but the following order is straightforward and works well:
Place the chassis on four jack stands.
Install the front upper and lower control arms.
Install the front springs and connect the upper and lower ball joints.
Install the front sway bar, bushings, and links.
Connect all tie rods.
Install the steering box and connect the pitman arm to the steering linkage.
Move to the rear:
Install both trailing arms.
Install the rear end and attach it to the chassis.
Install the rear axle hubs and axle half-shafts on both sides.
Install the rear cross-member.
Install the leaf spring and connect it to the spring links.
Install the metal fuel-tank support and the gas tank.
Install all four calipers, brake pads, and the four wheels, then lower the chassis onto the floor.
Install all brake lines with the proper clips at each wheel.
Connect the emergency-brake cable to the center chassis mounting pulley.
Install the completed and painted engine (minus the carburetor) onto its mounts.
Install the transmission complete with clutch assembly (if equipped).
Connect the driveshaft (U-joints already installed) from transmission to rear end.
Connect the fuel line from the fuel pump to the gas tank and any fuel vent line.
Install the exhaust manifolds, exhaust pipes, and complete the exhaust system.
Place the body-mount shims in their correct locations and secure them with 1½-inch-wide masking tape.
The finished chassis is now ready to be reunited with the restored body.